Calendar scheduler: Setting up your events
Last updated: June 9, 2026
Pro feature: This feature is available on Pro plans only. If you’d like to upgrade your plan, please contact our support team.
Overview
By default, your team will be able to schedule all events types for all users who have access to a specific location. In order to simplify your team's experience and to unlock external event booking, an admin or manager needs to set up which events are bookable at each of your locations and the rules around them — who can host them, when they can be booked, how long they last, and how much notice is needed.
This is done from Settings → Scheduling → Event types. Each location is configured separately, and within a location each event type has its own settings. You can copy settings between event types and between locations to save time.
If you don't see Scheduling under Settings, speak to your account manager.
Event types available
The event types you can configure depend on the care type of the location:
Care home — visit, assessment, care start, phone call, general
Home care — assessment, care start, phone call, general
How to use it
Find the setup page
Go to Settings → Scheduling → Event types.
You'll see a list of all your locations, with columns for name, care type, active events and an actions menu.
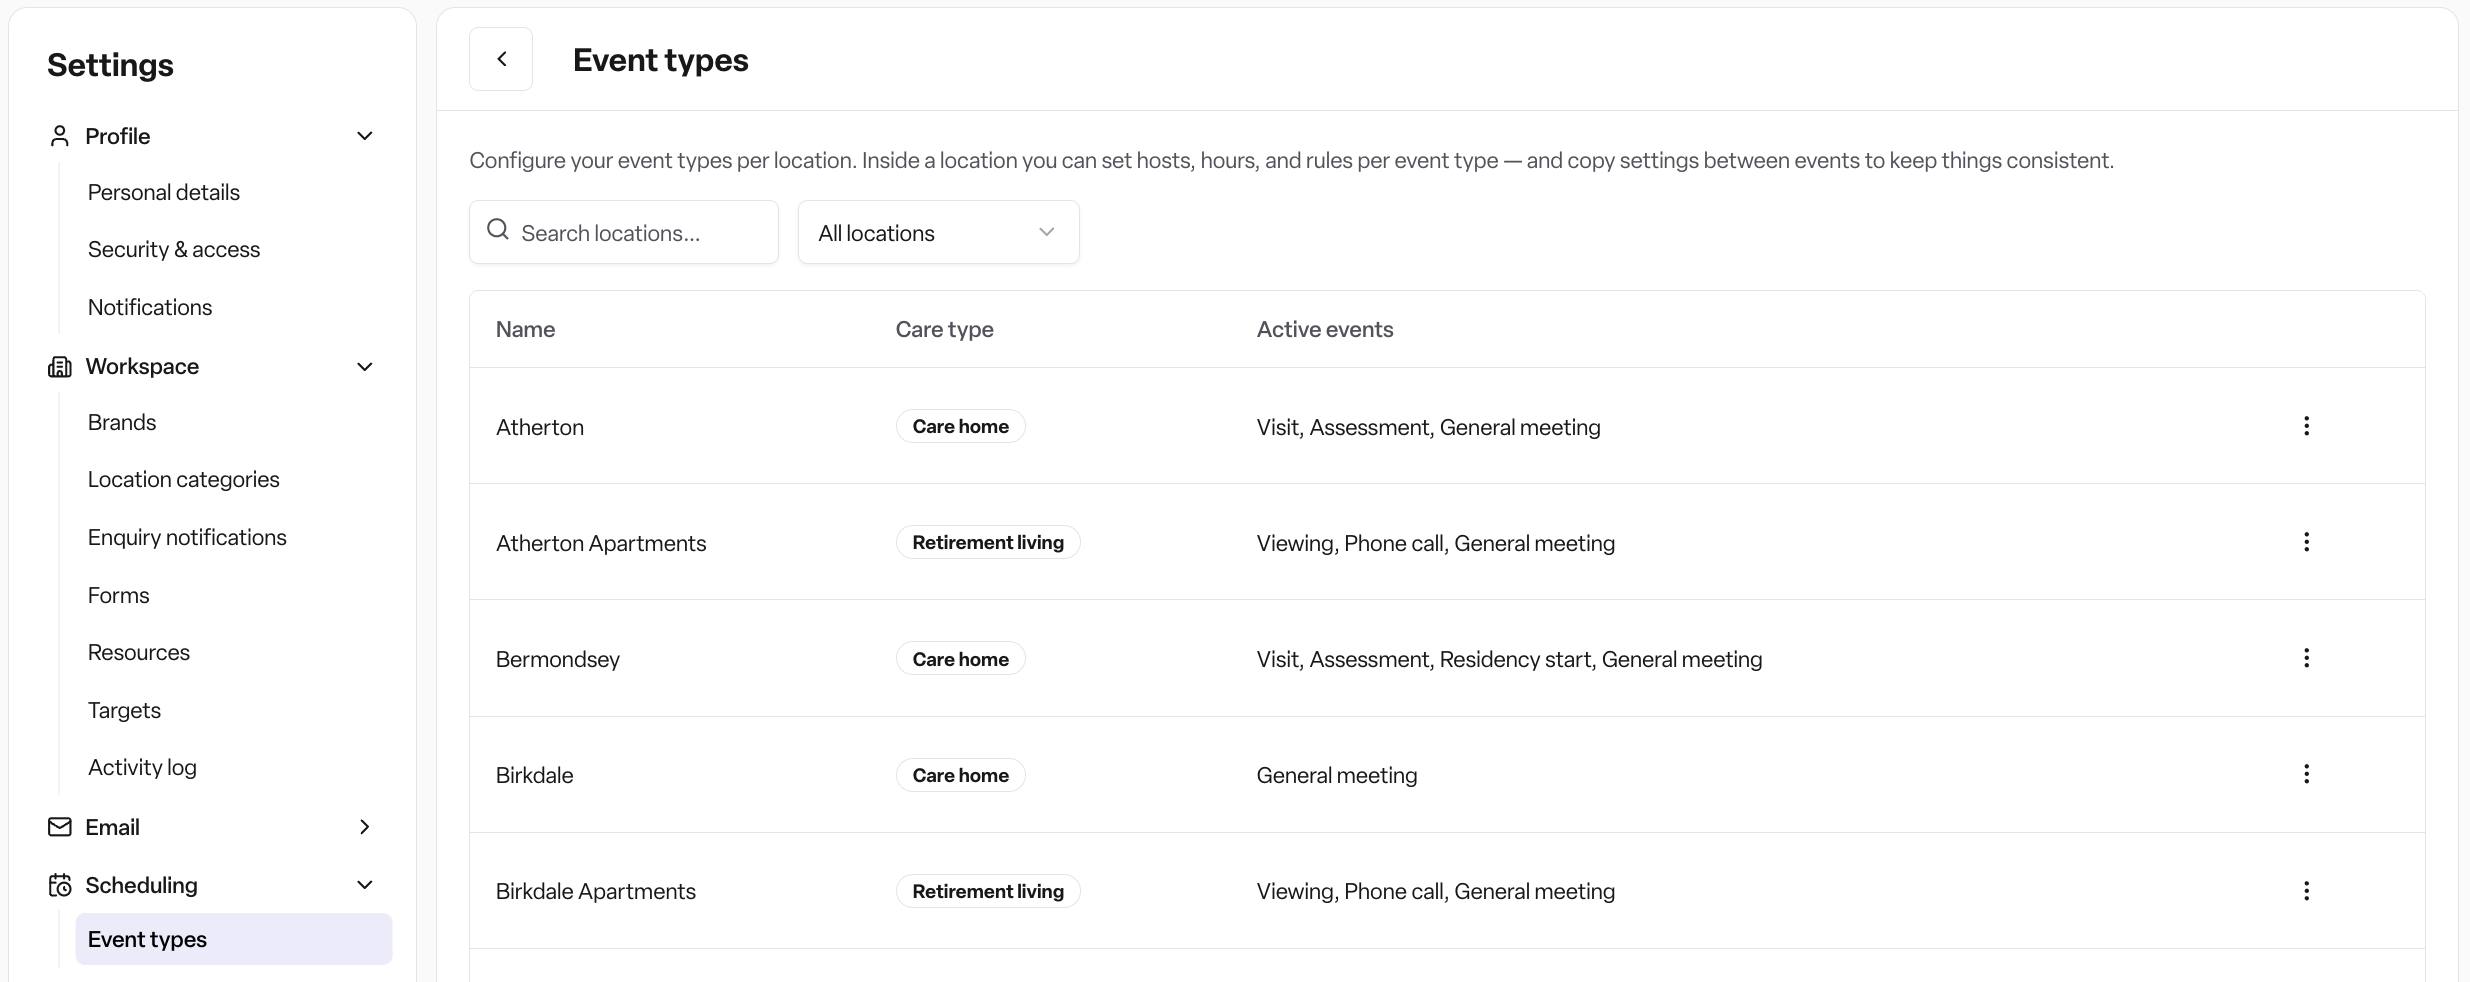
Use the search box or the care type filter to narrow the list.
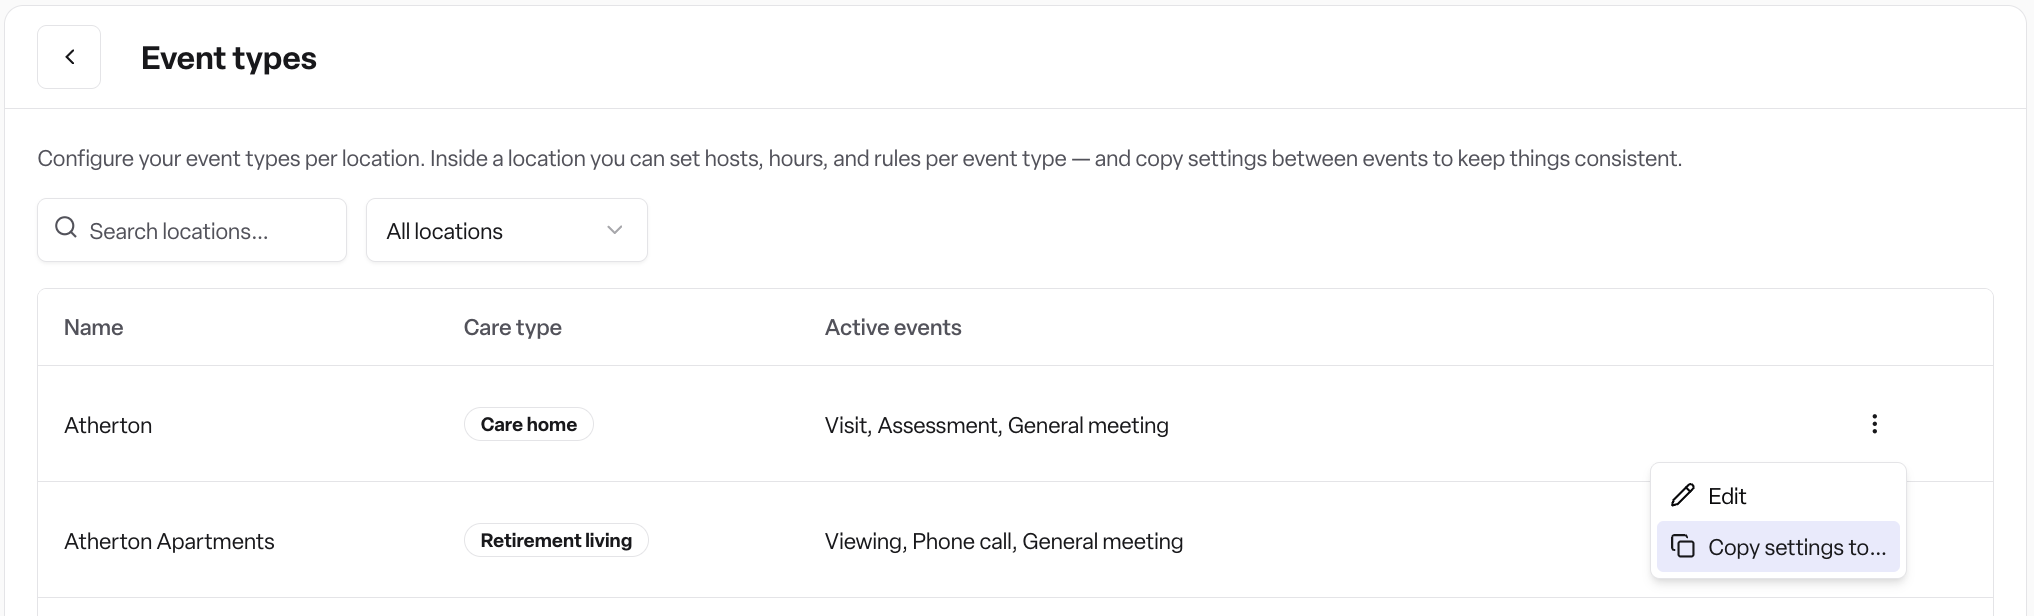
In the action menu (...) of your chosen location click Edit to open its event types.
Open an event type
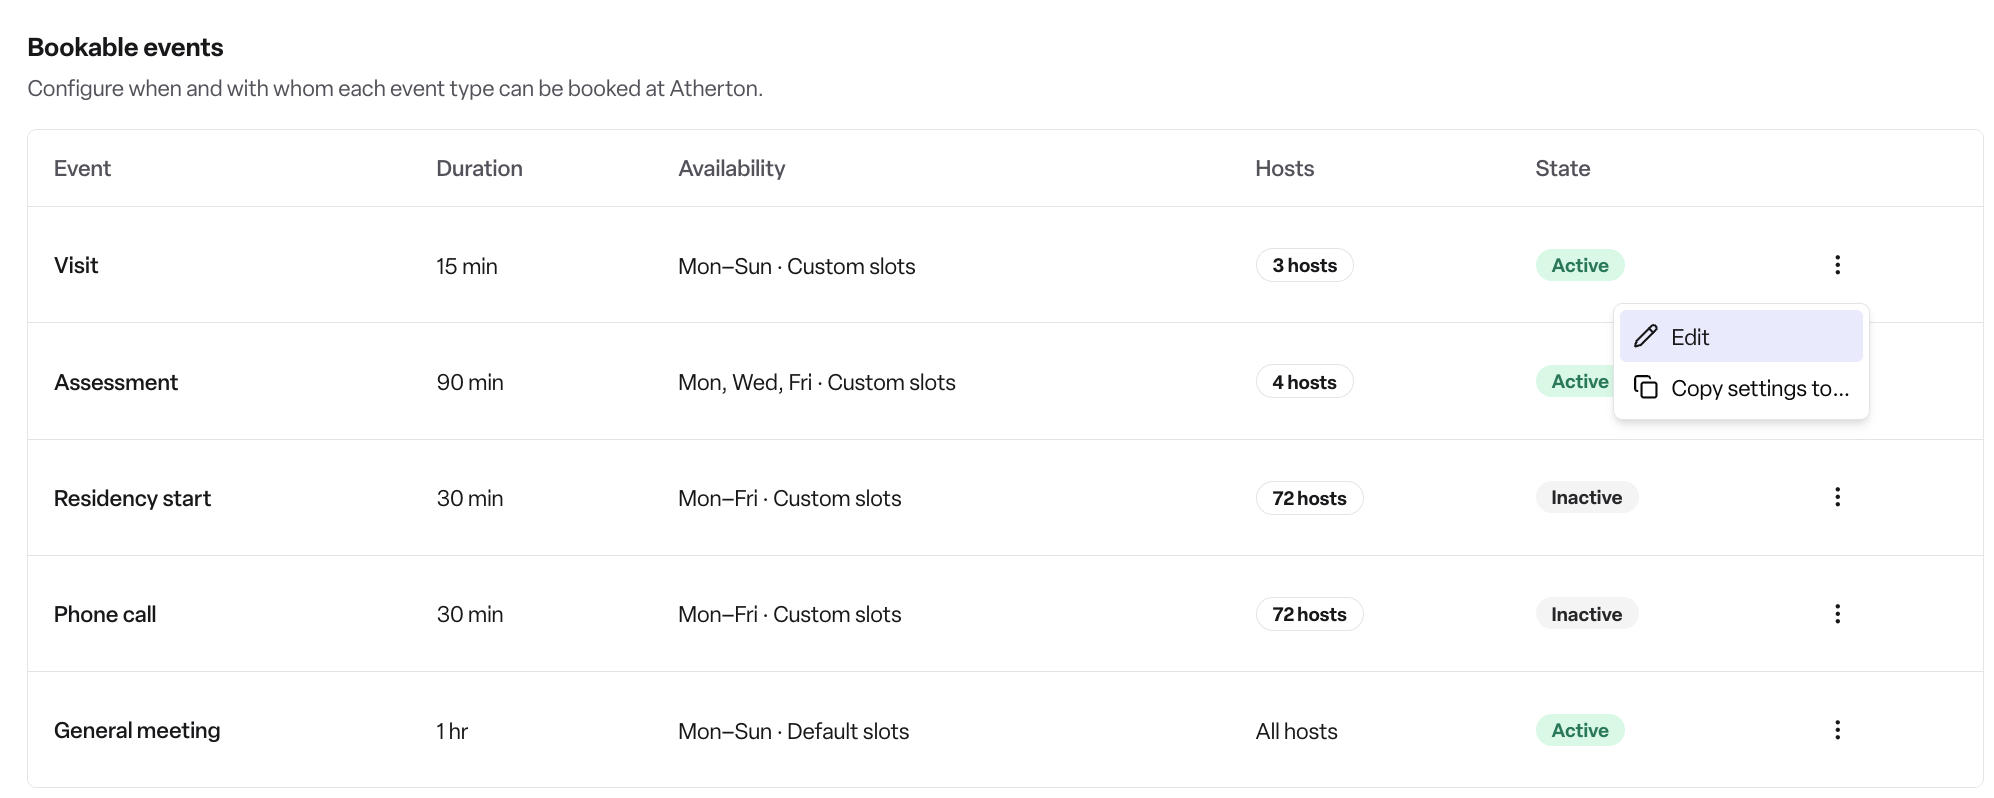
On the location's page, each event type is shown as a row with:
Event — the event name
Duration — for example "1.5 hr" or "90 min"
Availability — a summary of the bookable days (for example "Mon–Fri · Custom slots")
Hosts — either "All hosts" or the number of hosts
State — "Active" or "Inactive"
Click Configure (for an event type that hasn't been set up yet) or Edit (for one that has) from the row's actions menu. This opens the Event settings modal.
Configure an event type
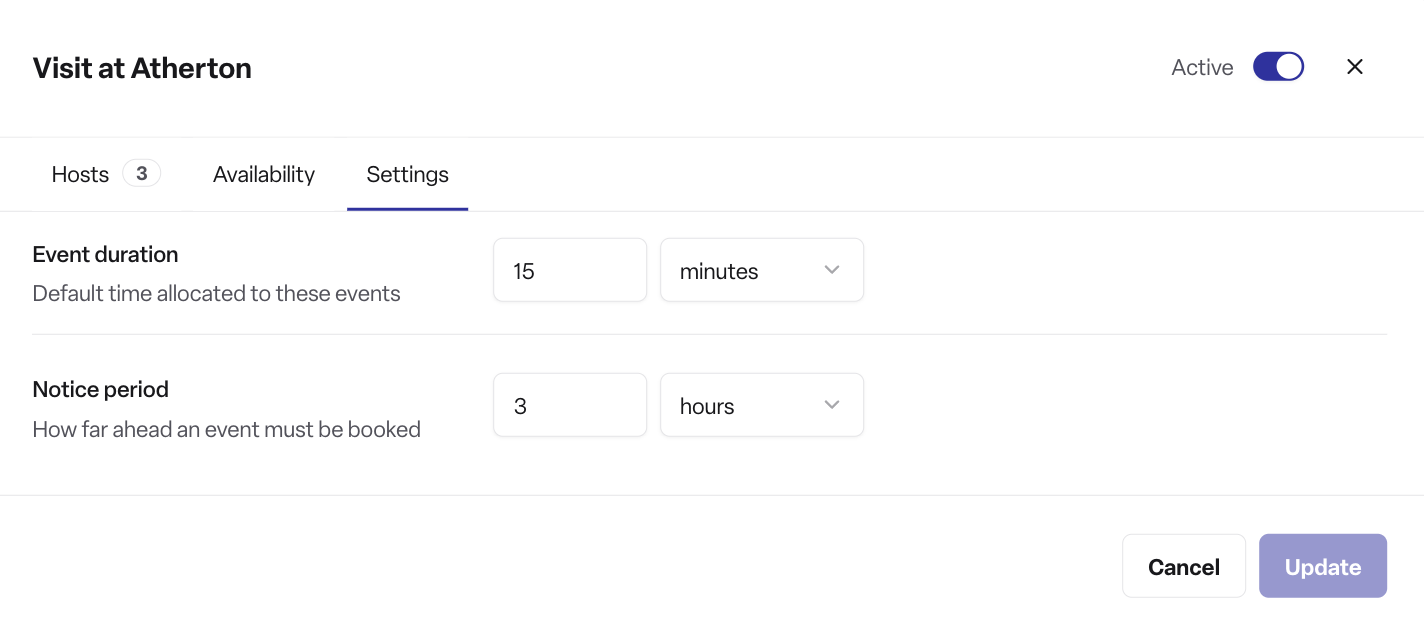
The modal has three tabs and an Active toggle in the top-right corner.
Active toggle — turn this on to make the event type bookable at this location, or off to hide it. It is on by default for newly configured events.
1. Hosts tab
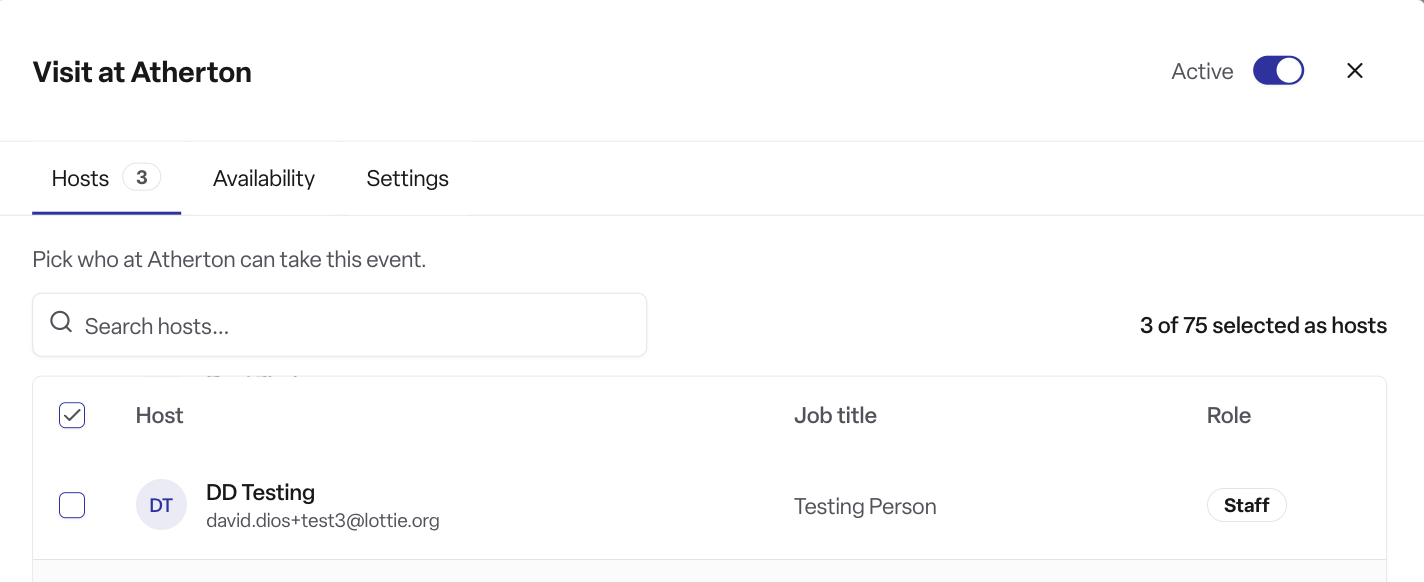
This is where you pick which staff members can host this event type at this location.
Use the search box to find staff by name, email or job title.
Tick each person to add them as a host. A counter at the top shows "X of Y selected as hosts".
Use the select-all checkbox at the top of the table to add or remove everyone at once.
You must select at least one host or the settings won't save.
2. Availability tab
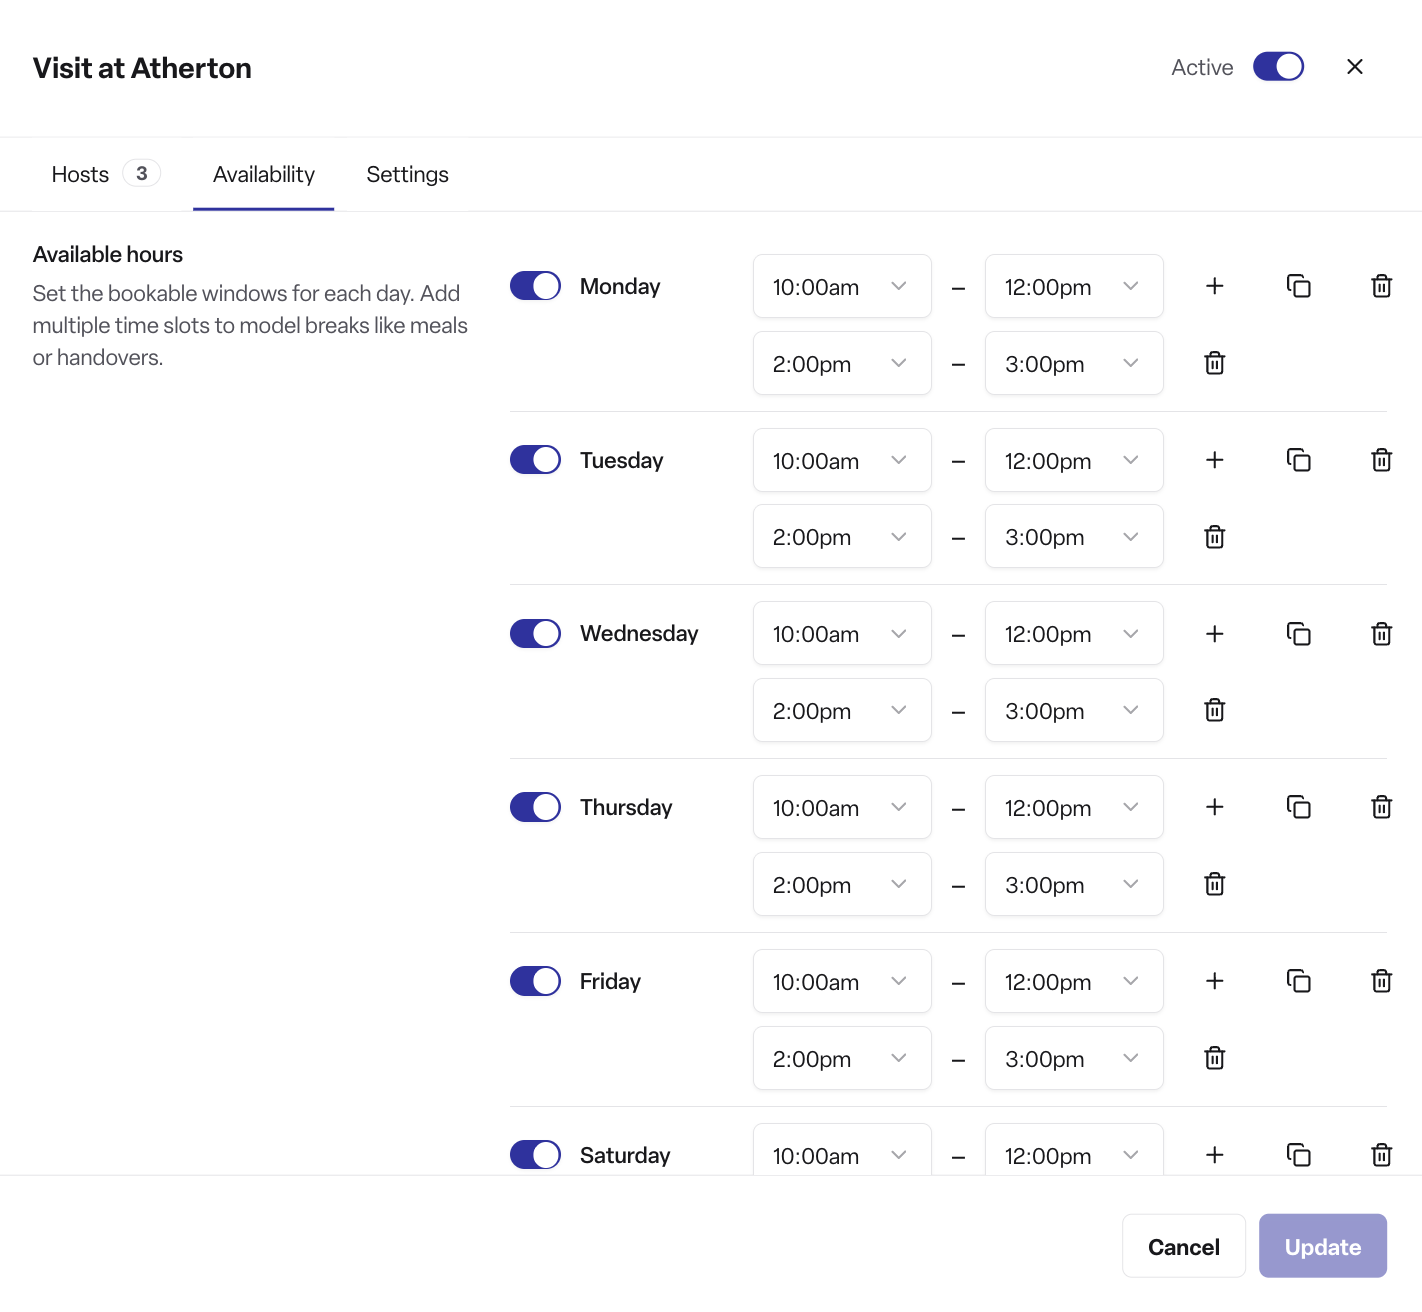
This is where you set the working hours when this event type can be booked.
Each day of the week (Monday to Sunday) has its own toggle.
Turn the day on to make it bookable; leave it off to mark it as closed.
For each open day, set a start time and end time. Times use a 15-minute cadence.
Click the + button to add another window on the same day — useful for modelling breaks like lunch or handovers.
Use the copy button next to a day to copy its times to other days.
Use the trash button to remove a window.
You must have at least one available hour window, and the windows on each day must not overlap or have an end time earlier than the start time.
3. Settings tab
This is where you set duration and notice period.
Event duration — the default time allocated to this event type. Enter a number and choose minutes or hours from the dropdown. Defaults vary by event type (for example viewings default to 60 minutes, assessments to 90 minutes).
Notice period — how far in advance the event must be booked. Enter a number and choose minutes, hours or days. Defaults vary by event type (for example viewings default to 2 hours, phone calls to 15 minutes).
Both fields must be at least 1.
Save your changes
Click Update at the bottom of the modal. The button stays disabled until you've made a change and the settings are valid. If anything is missing or invalid, you'll see a red message at the bottom (for example "Add at least one host" or "Available hour windows must not overlap").
Click Cancel to discard your changes.
Copy settings between event types (same location)
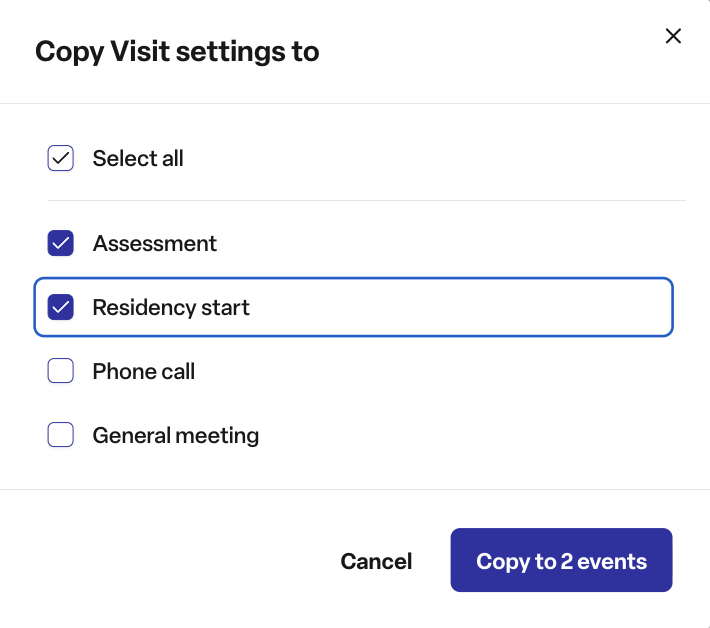
From the event row's actions menu, choose Copy settings to…. A dialog opens titled "Copy [event] settings to" with a checkbox list of the other event types at that location.
Tick the event types you want to copy to.
Click Copy to [n] events to apply.
This copies the duration, notice period and availability. Hosts are also copied because it's the same location.
Copy settings between locations
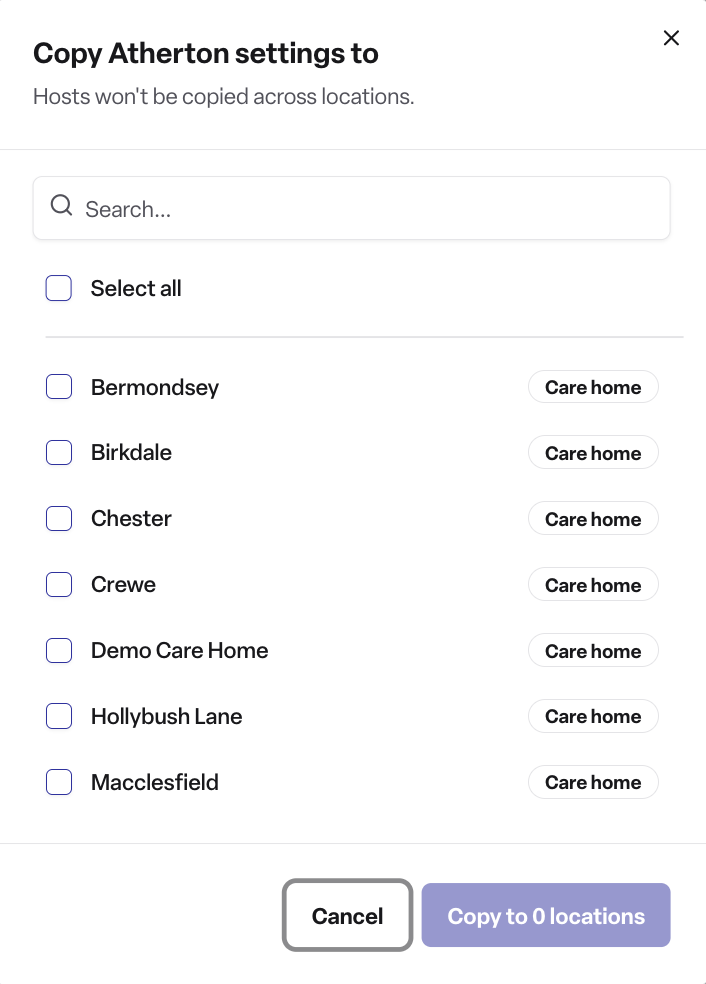
When viewing a location's event types, you can copy that location's setup to other locations of the same care type.
A search box appears if you have more than eight other locations.
In the actions menu (...) click Copy settings to...
Tick the locations you want to copy to.
Click Copy to [n] locations to apply.
Hosts are not copied across locations — you'll need to set hosts on each location separately. If there are no other locations of the same care type, you'll see "No other locations of this care type to copy to."
Rules and things to know
You must pick at least one host for an event type to be bookable.
You must have at least one available hour window, and windows on each day cannot overlap.
Event duration and notice period must each be at least 1 minute.
Newly configured events default to active.
The default working hours on each day are 09:00 to 18:00.
The list of bookable event types varies by location care type — you won't see "visit" on a home care location, for example.
Who can do this
Configuring event types, working hours and hosts requires the location event settings permission. Admins and managers have this by default.
Staff who book events don't need this permission — they just need access to the enquiry and the location.
Frequently asked questions
Q: Where do I set up event types? A: Settings → Scheduling, then click into the location you want to configure.
Q: Do I need to set up every event type before staff can use the scheduler? A: No — only event types you've set up and marked Active will appear when staff schedule an event.
Q: Which event types can I configure for each location? A: It depends on the care type. Care homes get visit, assessment, care start, phone call and general. Home care gets assessment, care start, phone call and general.
Q: Can I have different settings for the same event type at different locations? A: Yes. Each location has its own set of event type settings.
Q: How do I add a lunch break or handover into the bookable hours? A: On the Availability tab, click the + button on the relevant day to add a second time window. For example, you could set 09:00–12:30 and 13:30–18:00 to leave a lunch break.
Q: Can I copy settings from one event type to another? A: Yes — from the event row's actions menu, choose Copy settings to… and pick the event types to copy to. Duration, notice period, availability and hosts all copy.
Q: Can I copy settings from one location to another? A: Yes, but only to other locations of the same care type. Hosts are not copied across locations, so you'll need to set those separately.
Q: What's the difference between "Active" and "Inactive"? A: Active event types appear when staff are scheduling. Inactive ones are hidden but keep their settings, so you can switch them back on later.
Q: How short can an event be? A: At least 1 minute. The duration is the default time allocated when staff book this type of event.
Q: What's the notice period for? A: It blocks last-minute bookings. For example, a 2-hour notice period on viewings means staff can only book a viewing at least 2 hours from now.
Q: What if I forget to add hosts? A: The modal won't let you save. You'll see a red message saying "Add at least one host".
Q: Who can change event setup? A: Admins and managers, by default.
Q: Who can book events? A: Anyone with access to the enquiry and the location — they don't need any extra permission to schedule.