How to invite and manage team members
Last updated: November 18, 2025
Overview
This guide explains how to invite new team members to your Found workspace, understand the different access levels available, and assign the appropriate permissions to each user.
Understanding access levels
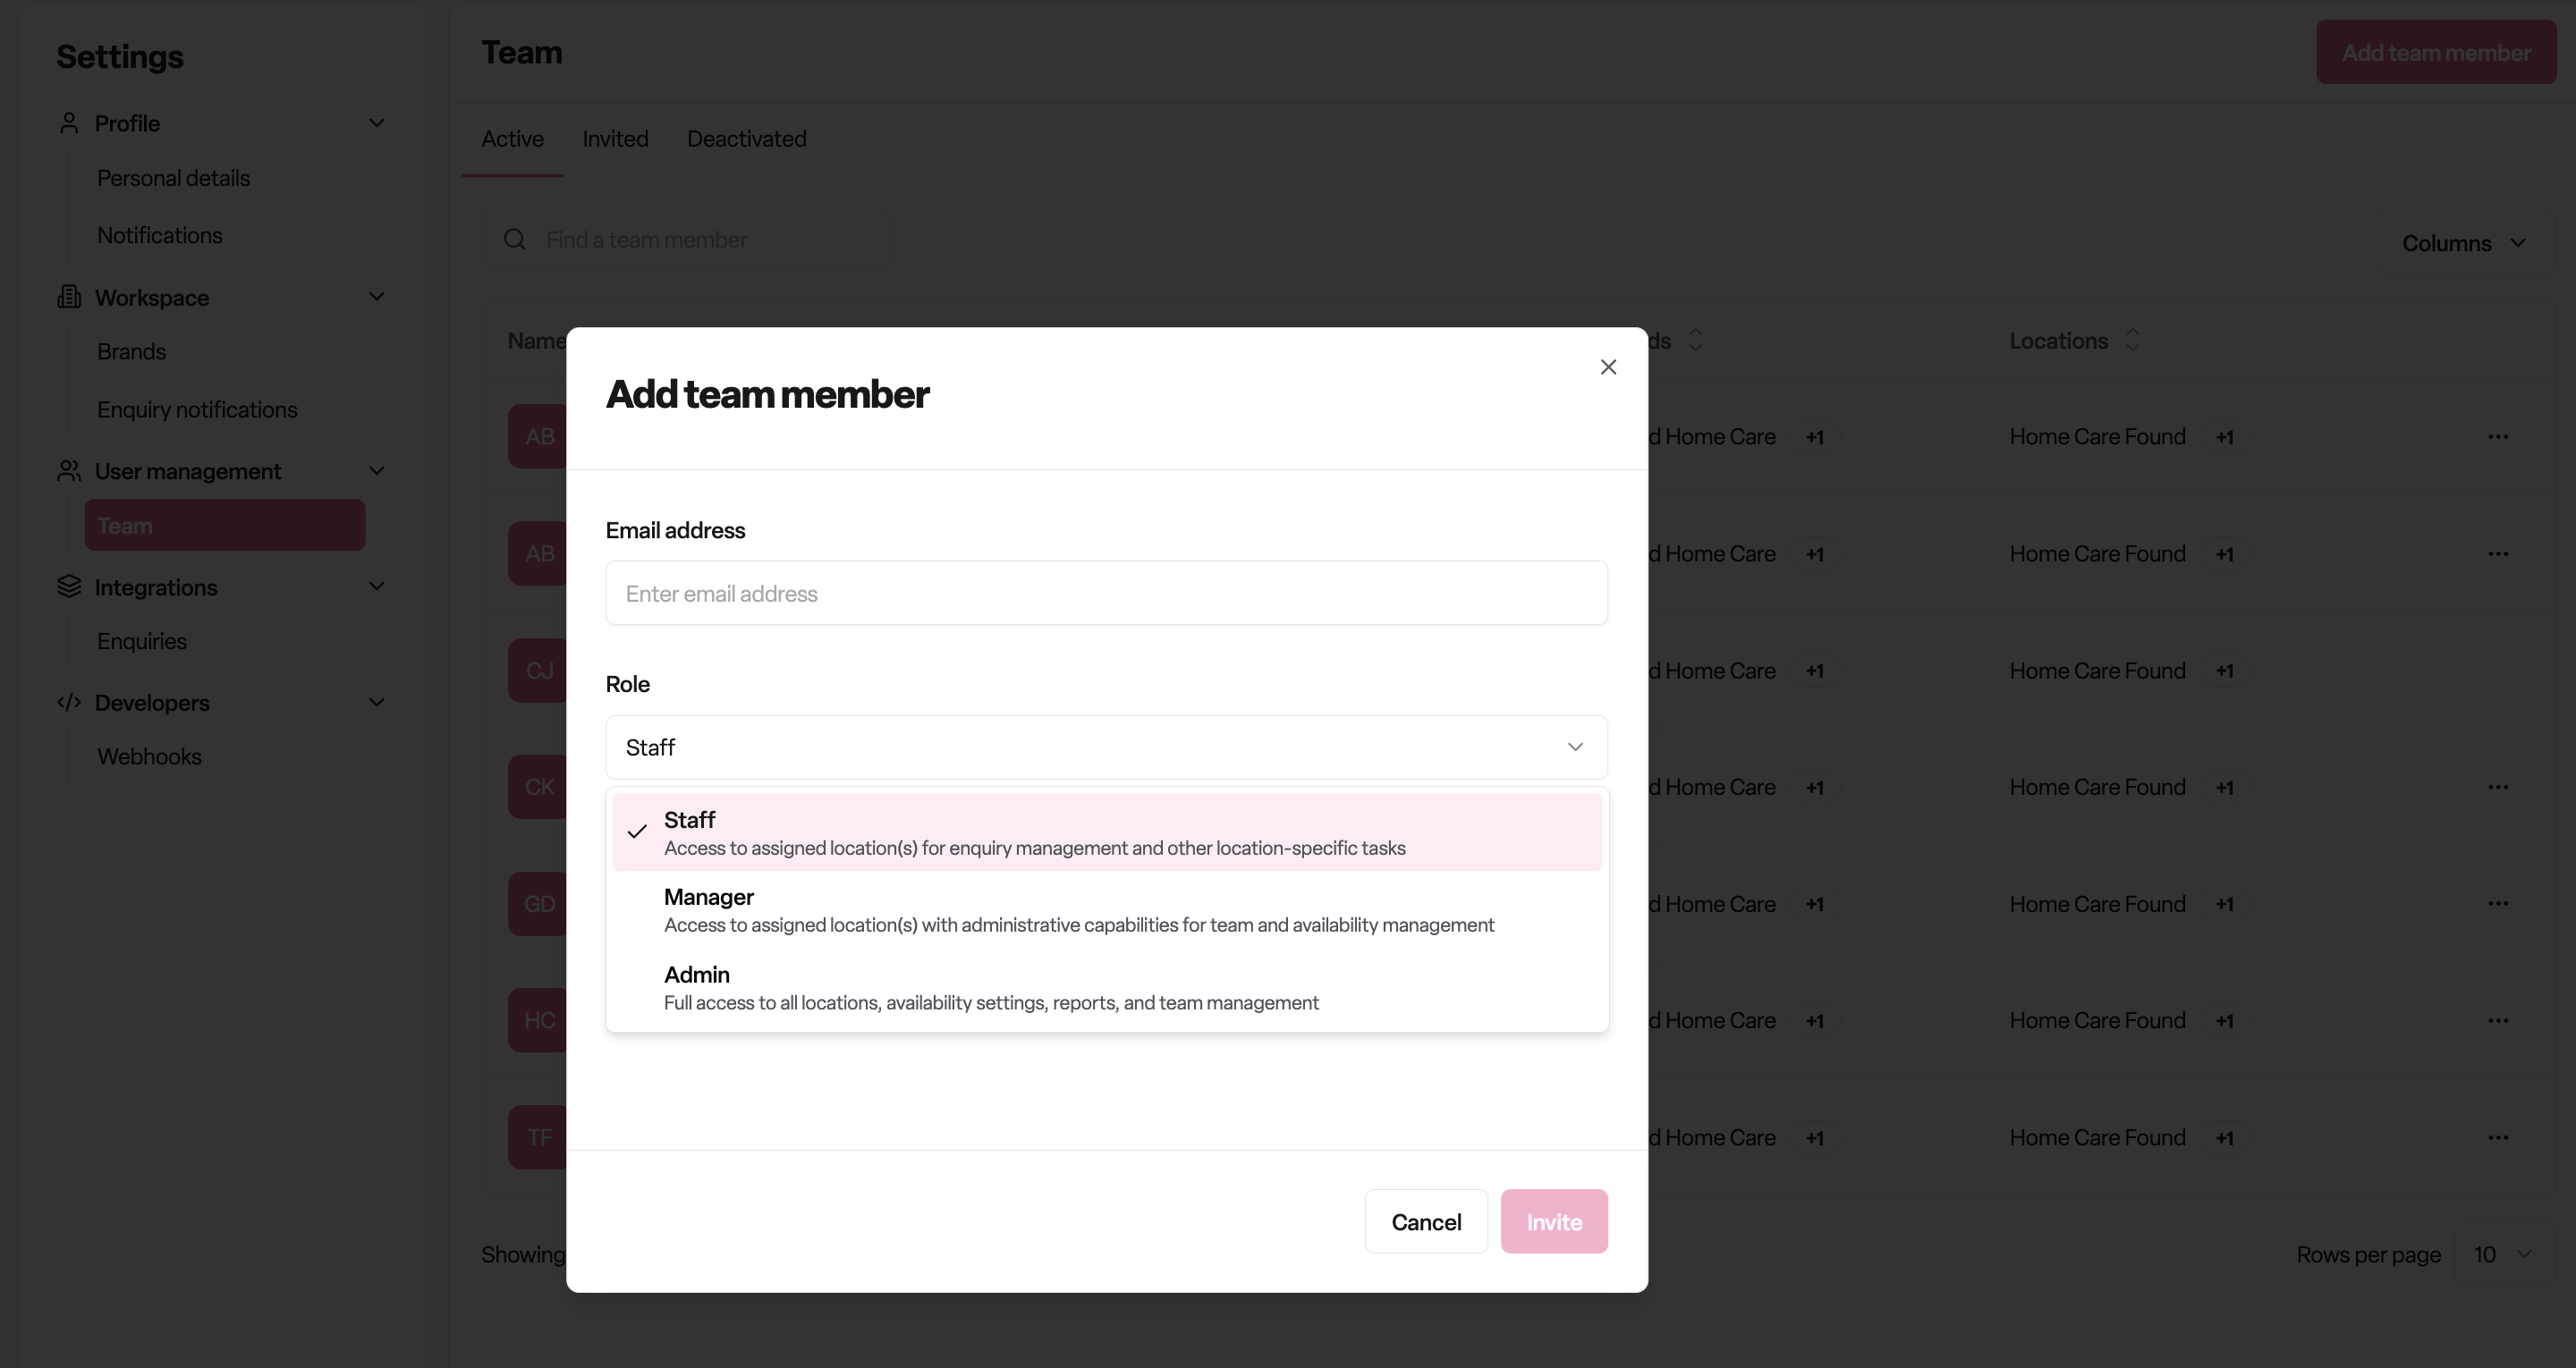
Found has three access levels (called "roles") that determine what a user can do in the system:
1. Admin
Full access to everything in your workspace
Admins can:
Access all locations and brands in your workspace
Manage location availability and pricing settings
Invite other users with any role (Admin, Manager, or Staff)
Manage team members and their permissions
Configure integrations and webhooks
View all reports and settings across the workspace
When to use: Assign Admin access to senior staff or business owners who need complete control over the system.
2. Manager
Location-specific administrative access
Managers can:
Access only their assigned location(s)
Edit availability and settings for their assigned locations
Invite Manager and Staff users (but not Admins)
Manage team members within their locations
Handle enquiries and administrative tasks for their locations
When to use: Assign Manager access to location managers or regional leads who need to manage specific sites but not the entire business.
3. Staff
Basic operational access
Staff members can:
Access only their assigned location(s)
Manage enquiries and day-to-day tasks for their locations
View information related to their assigned locations
Staff members cannot:
Invite other users
Change settings or availability
Access locations they're not assigned to
When to use: Assign Staff access to front-line team members who handle enquiries and bookings but don't need administrative capabilities.
How to invite a new team member
Step 1: Navigate to team settings
Click on Settings in your Found navigation menu
Select Team from the settings options
You'll see your team member list with tabs for:
Active members (currently active users)
Pending invitations (invited but not yet accepted)
Deactivated members (removed users)
Step 2: Start the invitation process
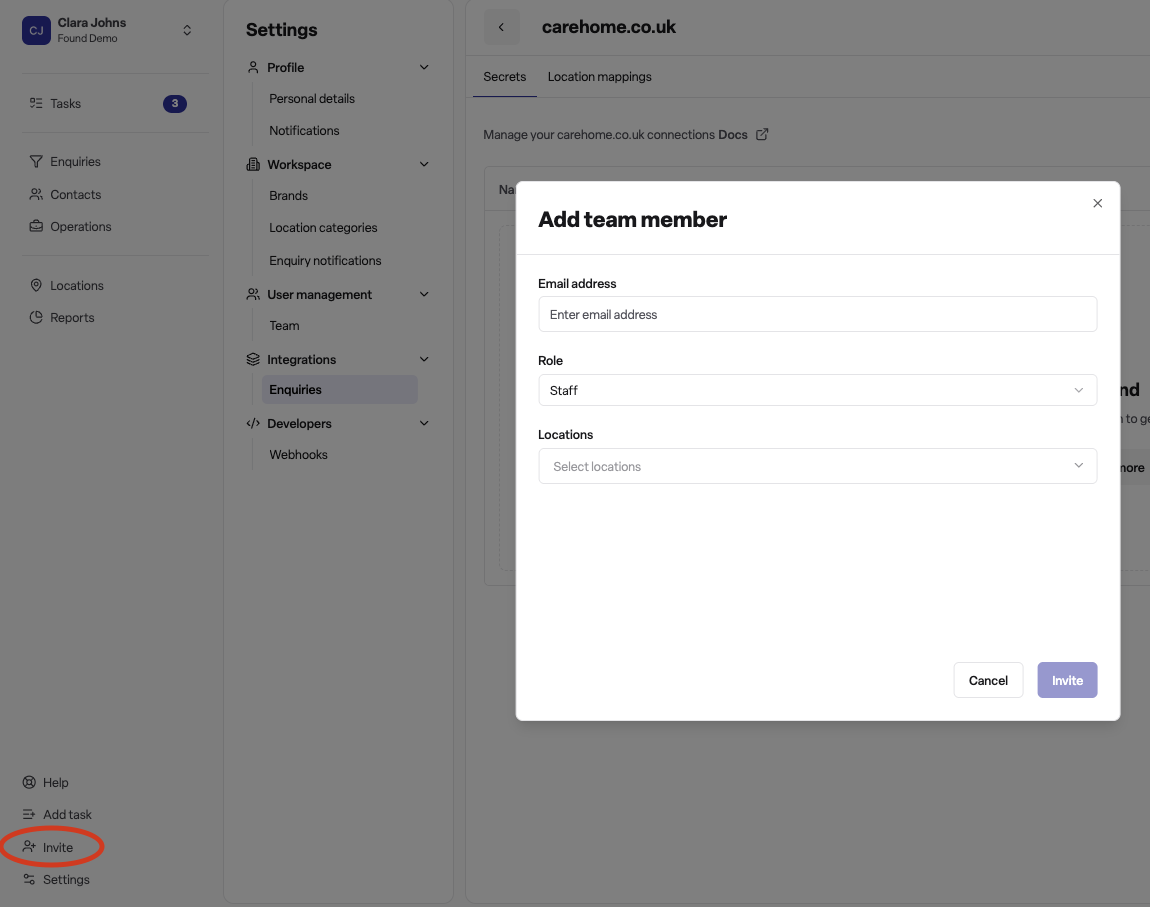
Click the Add Team Member button (typically at the top right of the team list)
The "Add Team Member" dialog will open
Step 3: Enter the user's details
Fill in the following information:
Email address (required)
Enter the email address where the invitation will be sent
The user will receive an email with instructions to join your workspace
Select access level (required)
Choose the appropriate role from the dropdown:
Admin (if you're an Admin)
Manager (if you're an Admin or Manager)
Staff (if you're an Admin or Manager)
Note: You can only invite users with roles equal to or below your own access level. For example, Managers cannot invite Admins.
Assign locations (required for manager and staff)
If you selected Manager or Staff, you must assign at least one location
Click the location selector and choose which location(s) this user should access
The user will only be able to see and manage enquiries, bookings, and settings for their assigned locations
Note: If you selected Admin, location assignment is not required - Admins automatically have access to all locations in your workspace.
Step 4: Send the invitation
Review the details you've entered
Click Invite (or Add Team Member)
The system will:
Create the user account
Send an invitation email to the specified address
Add the user to your "Pending invitations" list
Step 5: User accepts invitation
The invited user will receive an email with a link to join Found
They'll click the link and complete their account setup
Once complete, they'll move from "Pending invitations" to "Active members"
They can now log in with their assigned access level
Managing existing team members
View team members
Active members tab: See all users currently active in your workspace
Pending invitations tab: See users who have been invited but haven't accepted yet
Deactivated members tab: See users who have been removed from the workspace
Edit a team member's access
Find the team member in your active members list
Click the Edit button (or menu option) next to their name
You can change:
Their access level (Admin, Manager, or Staff)
Their assigned locations (for Manager and Staff roles)
Click Save to apply the changes
Note: You cannot edit your own access level. Another Admin must make changes to your account.
Resend an invitation
If a user hasn't received their invitation email:
Go to the Pending invitations tab
Find the user in the list
Click Resend invitation
They'll receive a new invitation email
Deactivate a team member
To remove a user's access:
Find the team member in your active members list
Click the Deactivate button (or menu option)
Confirm the action
The user will immediately lose access to Found
They'll move to the "Deactivated members" list
Best practices
Assigning access levels
Start with the minimum access needed: You can always increase permissions later
Review access regularly: Ensure team members still need their current access level
Limit Admin access: Only assign Admin to users who need full system control
Use location assignment: Restrict Manager and Staff to their specific locations for better security
Managing invitations
Check pending invitations regularly: Follow up with users who haven't accepted
Use correct email addresses: Ensure you're sending to an email the user actively monitors
Communicate with invitees: Let them know to expect an invitation email (check spam folders)
Security considerations
Deactivate promptly: Remove access immediately when a team member leaves
Don't share accounts: Each person should have their own individual account
Monitor active members: Regularly review who has access to your workspace